

DIY | Halloween Washi Tape Stickers
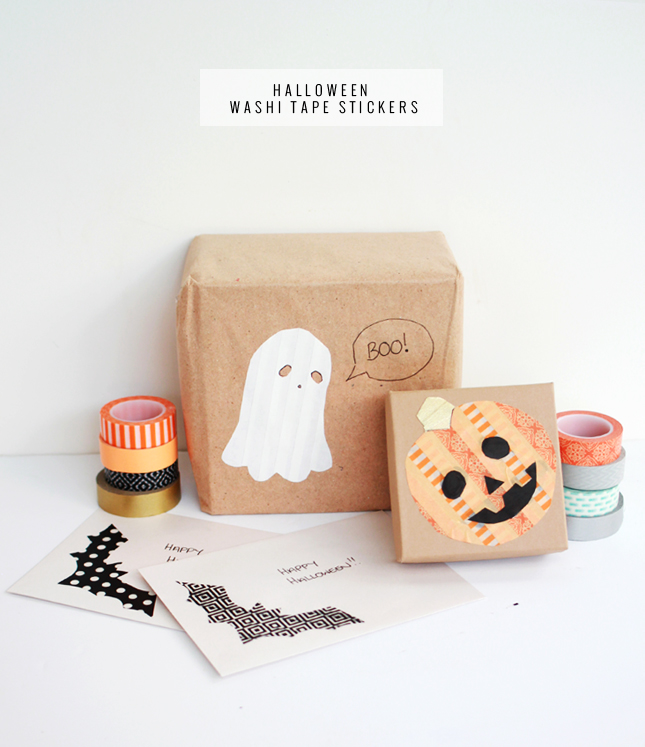
I’ve always wanted to get involved in the Halloween craze that hits the blogging world every October. I (unfortunately) don’t really get to celebrate the holiday, so it seems silly to carve a pumpkin or make elaborate Halloween decorations when I’m not really going to use them. This year however, I finally had a solid reason to get into the spirit! A friend is holding a Halloween Party for her little ones, so after picking up a couple of gifts I thought it would be awesome to style the wrapping appropriately with some home made stickers.
My favourite craft ‘supply’ would have to be washi tape. Ever since I discovered it, I’ve been obsessed. I have a box full of the stuff and I use it for pretty much everything. The best thing about it is that it is strong, but not super sticky. Generally, it wont damage something if you stick it to it. It’s the perfect material for awesome, stripey stickers…
 What You Need:
Paper & Pencil
Washi/paper masking tape
Baking or parchment paper
Sharp scissors
Exacto knife (optional)
What You Do:
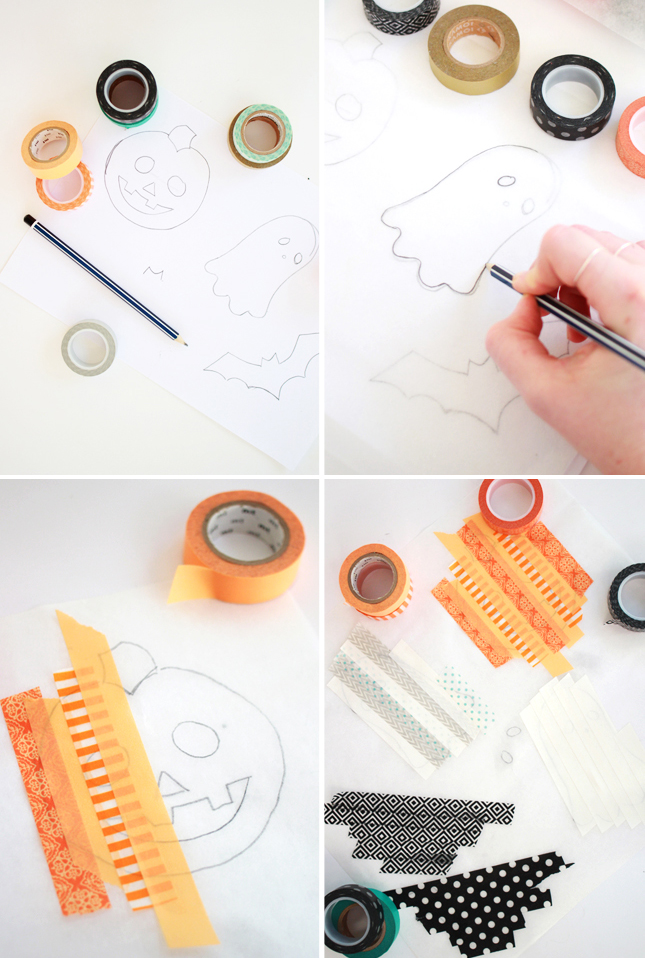
1. Start by choosing your sticker designs; You want images that are made up with block shapes. The more detail required, the more you are going to need to make intricate cuts in the sticker which will weaken the piece as a whole. Once you know what you want, sketch out your design, or find a template online and print out onto standard paper.
2. Place a piece of baking paper (or wax paper if you can get it) on top of your images and weigh down while you trace them onto it. Baking paper has one side that is slightly shiny and one side that is rougher - you want to draw onto the non-shiny side.
3. Flip the baking paper over (onto the shiny side) and, starting from one side of each image, stick down a strips of masking tape so that they cover the image. Each strip of tape should overlap the previous piece. This ensures that your sticker holds as one whole shape. The tape should cover a little bit more than the template so you can trim away edges later.
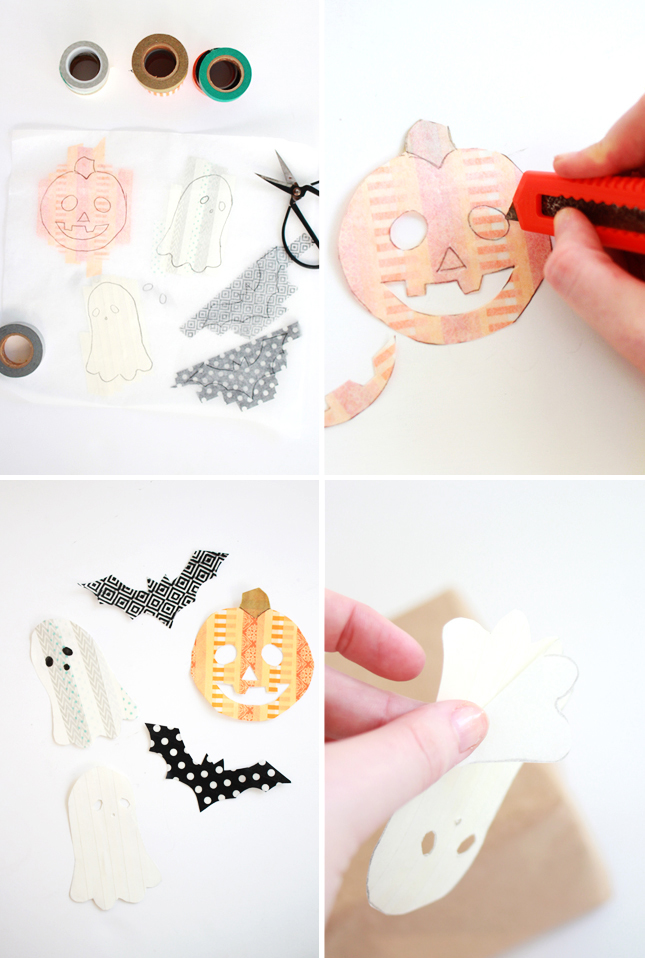
4. When each shape is covered with layers of tape, you can cut out each sticker, trimming away the excess tape. Be careful as you trim as the tape may come away from the paper if you are not gentle.
5. Now you can make any finishing touches to your sticker. For example; I added a stem piece of different coloured tape to the top of the pumpkin sticker. Using an exacto knife or craft blade, cut away any interior pieces like eyes and mouths.
6. Your sticker is now ready to go! To use, just carefully peel the paper away from the tape layer side. Stick down on your chosen surface and smooth down.
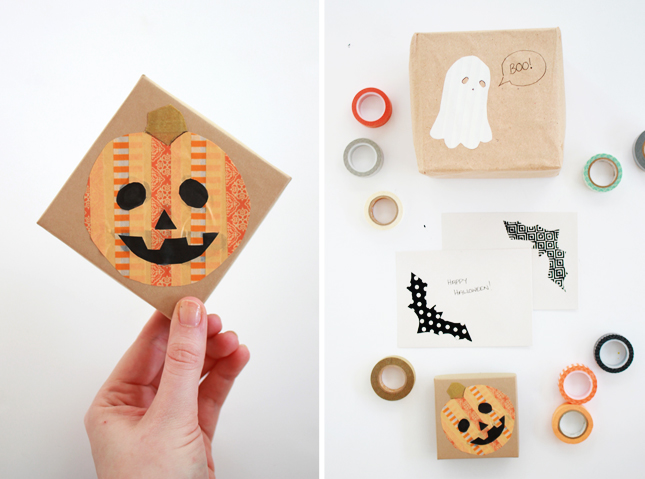
You can use these stickers where ever you like! On cards and gifts, stick onto card and use as decorative art piece, even use as a paint safe wall decal in your home! Basically, you can stick them pretty much anywhere! Go nuts!

No Comments